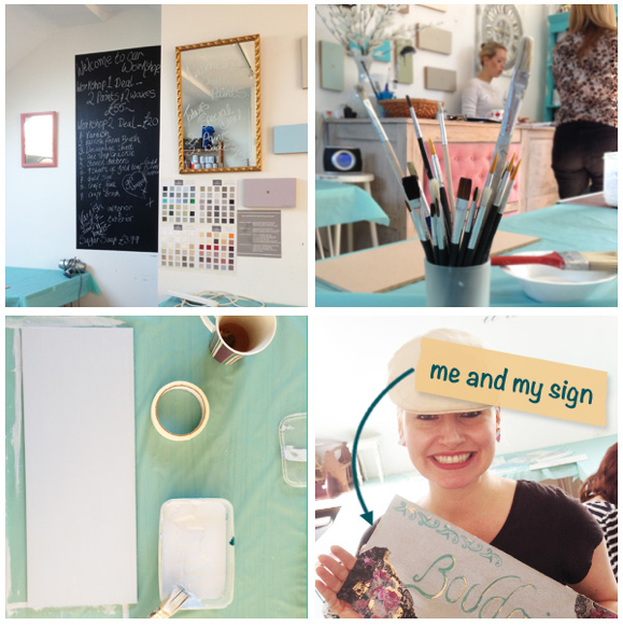
Following on from the workshop 1, Mum and I immediately signed up to the Shabby Chic Workshop 2 “Paint Effects & Finishing Techniques”. Workshop 2 focuses on creating shabby chic embellishments to your furniture such as decoupage, gold leafing, stencilling and crackle glaze. I really liked the idea of personalising my new found love of shabby chic-ing just about everything in sight at the moment. We were pretty excited about this workshop and felt this could be where the real creativity began. I suggested Mum make a sign for the boys room and I decided I’d make a sign for my bedroom. Prior to attending I sourced some images and coloured papers to use and took them along with me.
Turning up at the workshop, places had been set with a precut piece of MDF to turn into a shabby chic sign, (for those who hadn’t brought previously painted shabby chic furniture), Autentico chalk paint for people to use along with sponges, paintbrushes and all the necessary equipment needed for the mornings 2 hour workshop. We learnt how to do a heavy crackle glaze with paint and PVA glue, gold leafing, decoupage, distressing and a lighter crackle glaze effect using a specific crackle glaze medium.
There wasn’t so much demonstrating this time as there was in the shabby chic workshop 1 and people quickly decided that they wanted to do their own thing . This meant people needed to paint, decoupage, crackle glaze, distress and gold leaf at different times which felt a little chaotic. My carefully selected decoupage pieces were discarded very quickly in favour of the supplied materials, in order to just have a go.
I think the real creativity starts when you get home and you can experiment. For this purpose DIY Shabby Chic were selling small kits for around £20 which included crackle glaze medium, gold leaf, sponges etc; a great idea and very economical. I’ve since sourced my own materials but if you’re just looking to have a crack at the shabby chic whip, a ready made kit is advisable.
My finished piece, is now in my studio awaiting to be stripped and redone because it was quite frankly a bit of a dogs dinner! I think I was a little bit over enthused as to what I wanted to achieve but I certainly learnt from my mistakes. To be fair, the "DIY Shabby Chic" ladies do say you can take your piece home as ‘reference’ to the new skills learnt, so I think they appreciate there is a lot to take in, in only a 2 hour slot.
This is a good shabby chic workshop to attend if you want to try your hand at decoupage, crackle glaze and gold leaf techniques. I have had a lot of fun and success since then, experimenting in my own time.
The "DIY Shabby Chic" ladies are very professional, friendly and approachable and their shabby chic workshops have definitely been successful in giving me a basic understanding of the processes involved in shabby chic furniture. They also introduced me to the fantastic chalk based Autentico paint, a revelation as far as I’m concerned. I’ll be posting more on that later. In the meantime thank you to the "DSC" Ladies for spreading the shabby chic love here in Brighton!
 RSS Feed
